> For the complete documentation index, see [llms.txt](https://docs.spacetree.org/spacetree/llms.txt). Markdown versions of documentation pages are available by appending `.md` to page URLs; this page is available as [Markdown](https://docs.spacetree.org/spacetree/proqyz-evaluation-settings.md).
# ProQyz Evaluation Settings
## ProQyz Evaluation
1. Log in to WordPress.
2. Navigate to `ProQyz > Evaluation`.
### Setting Pricing for Evaluations
To configure pricing for paid writing evaluations:
1. Under the `Plans` section:
* Select `Teacher Evaluation` to set the price for a teacher-evaluated essay.
* Select the `AI Evaluation` tab to set the price for AI writing evaluation.
By following these steps, you can effectively manage the pricing options for the different evaluation types.
Writing Evaluation Plans
### **Writing Evaluation Settings**
Add the instruction which will be visible to student above the price plans.
* **Writing Task 1**
* Ensure the `Task 1` box is checked to enable payment and evaluation.
* Task Title: `Your Task 1 Title`
* Price: `$X.XX` (Set by Instructor/Institution)
* **Writing Task 2**
* Ensure the `Task 2` box is checked to enable payment and evaluation.
* Task Title: `Your Task 2 Title`
* Price: `$X.XX` (Set by Instructor/Institution)
By following these steps, you ensure your selected tasks are submitted for evaluation and the respective fees are correctly charged.
### **Speaking Evaluation**
* Ensure the `Speaking` box is checked to enable payment and evaluation.
* Title: `Your speaking Evaluation Title`
* Price: `$X.XX` (Set by Instructor/Institution)
### **AI Evaluation Settings**
* Ensure the `AI Evaluation` box is checked to enable payment and evaluation.
* Title: `Your AI Evaluation Title`
* Price: `$X.XX` (Set by Instructor/Institution)
* Save the changes to enable AI evaluation for the selected tasks.
## **API Key Configuration**
* Select the model:
* Default: `ChatGPT-4`
* Enter the `OpenAI API Key` in the designated section.
* Save the changes to activate the evaluation feature.
## **Setting up the Prompt for an AI**
### How To Add a New AI Prompt on ProQyz
1. **Log in** to [app.proqyz.com](https://app.proqyz.com)
2. Click on **ProQyz** on the left side menu.
3. Navigate to **AI Prompts** under the **Experiment** option.
4. Click on **Add New Prompt**.
5. Enter a **title** for your prompt.
6. Add your prompt in the **AI Prompt Details** box.
7. At the bottom, select the **writing test** you want this prompt to work on.
8. **Save the changes**.
Once completed, the prompt will be applied to the selected writing test.
## **How To Get Your Own OpenAI API Key**
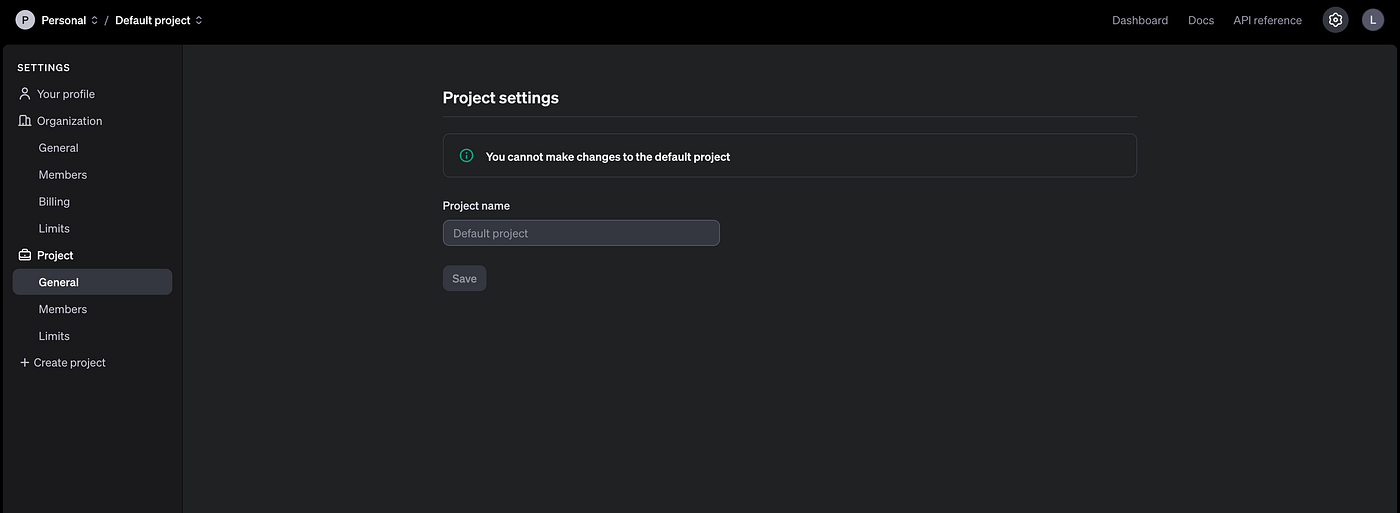
### Create A New Project
First of all, create a new project. Go to the [Projects page](https://platform.openai.com/settings/proj_default/general) and create a new project from the vertical menu on the left.
Create a new project to get an API key on OpenAI
In the pop-up, add your project name e.g. Writing AI, and create a new project. On the next page, you will see your project name and the project ID, which will be useful later.
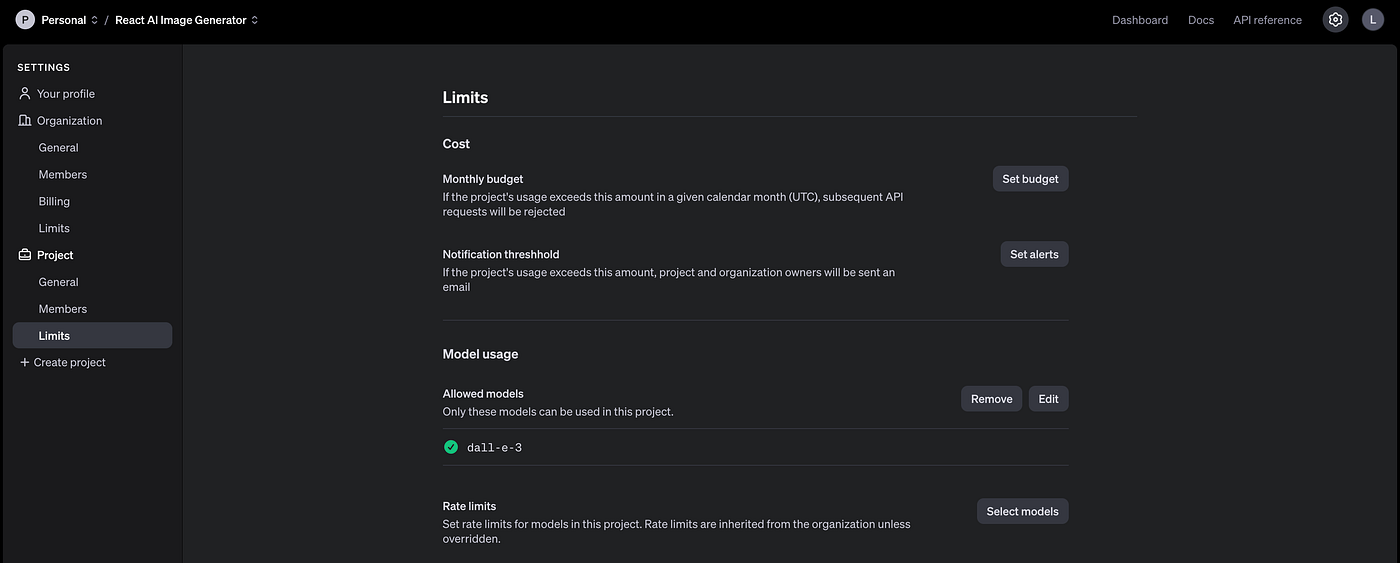
### Allow Models
Make sure you are in the correct project. You can see the project name on the navigation bar on top of the screen. In the picture below, it’s called React AI Image Generator.
Go to Limits from the vertical menu on the left. In the section Model usage, allow to use `gpt-4`, or any other model you may want to use.
It is a good practice to only select the models you think you will use and add more as necessary.
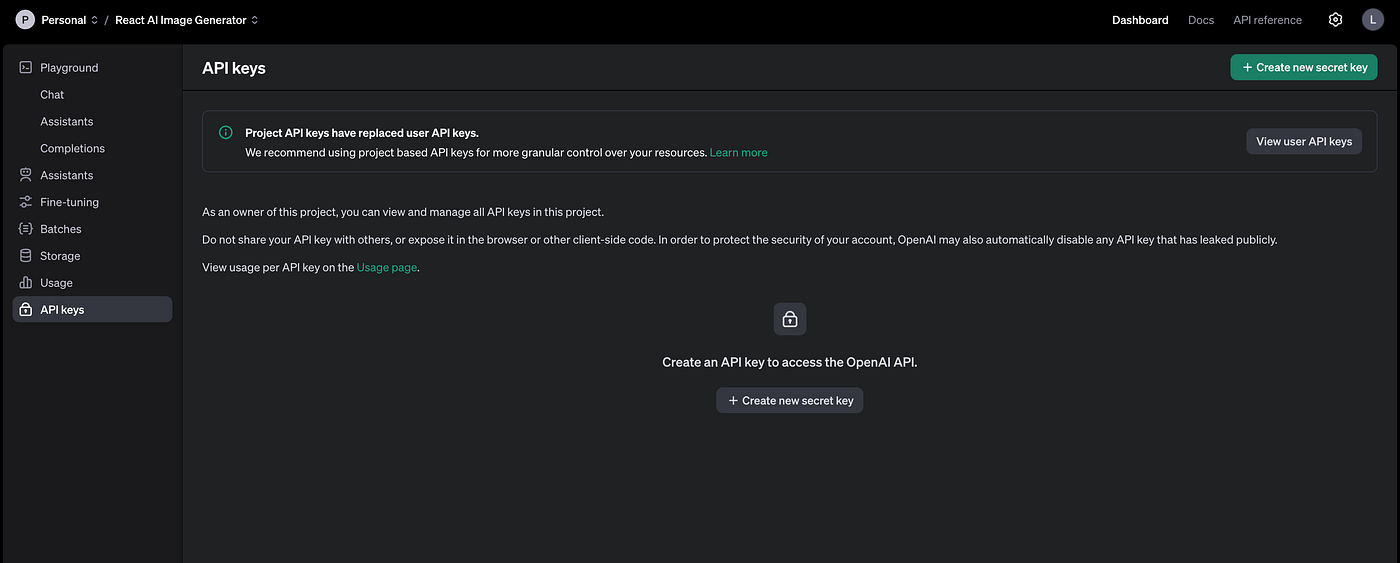
### Create A New API Key
Go to the [API Keys](https://platform.openai.com/api-keys) page and click on the button Create new secret key.
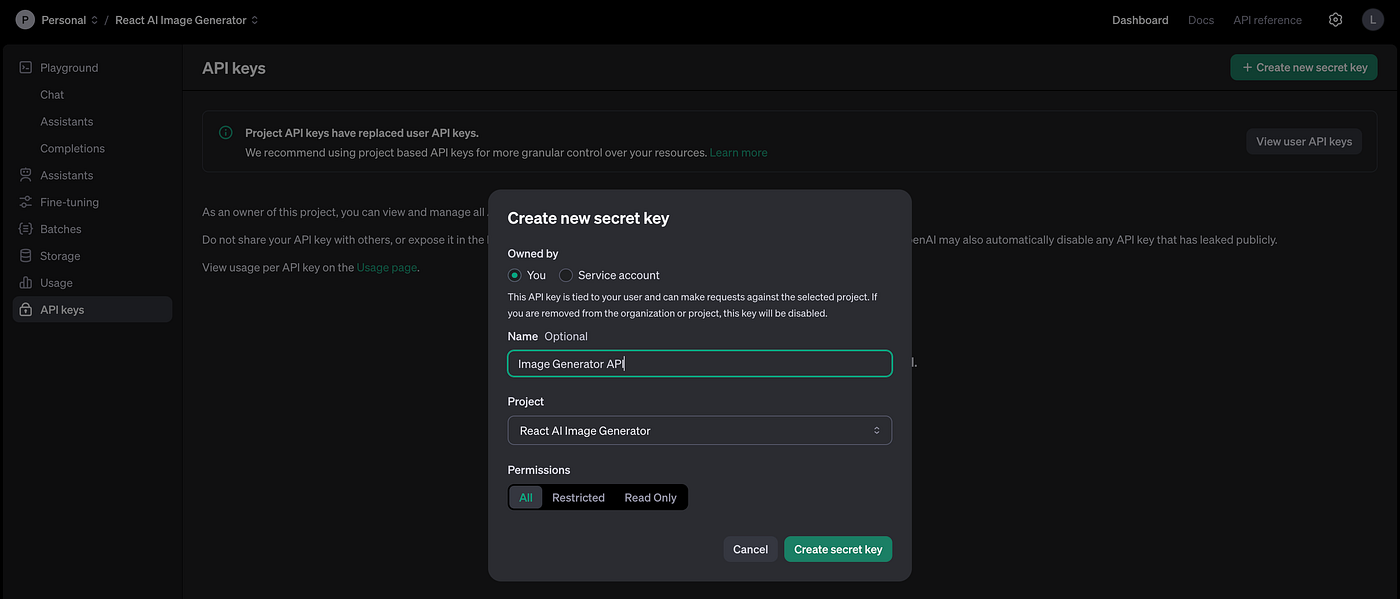
Create a new secret key
In the next pop, just add the name of your API key so you can remember it in the future. Every project could use more than one API key for different things.
Create a new secret key
Once you create the key, you should save it *somewhere safe and accessible. For security reasons, **you won’t be able to view it again** through your OpenAI account. If you lose this secret key, you’ll need to generate a new one.*
This sounds more scary than it actually is. But it is correct. If you lose your API key, you will have to create a new one.
In the same way, you can create as many keys as you need.